Showing posts with label Geometry. Show all posts

Thursday, July 16, 2015

Pi Day Eve Celebration 2015


This post has been in my drafts folder for months and I never got around to finishing it.  We decided this year as a 7th grade math department to have a "Pi Day Eve" Celebration since Pi day actually fell on a Saturday this year.  Part of the 7th grade math curriculum is learning about the area and circumference of circles so this fit perfectly into our curriculum.  When we did our celebration our Honors Math 7 students had just finished Chapter 12 on Circles and our Math 7 students were still a few weeks away from starting the chapter.  It ended up being fine that this was a perfect culminating activity for Honors Math and sort of a preview for our other classes.  I do have to say that when we started Chapter 12 with our Math 7 students they definitely remembered what we did on Pi Day Eve so that background really set the stage for starting the chapter off with some common background knowledge for all students.  This was obviously several months ago, so I apologize if I don't remember all the details, but you will get a decent idea of how we structured this, in case you want to do something similar in your class or school next year for Pi Day.

Our class periods are 60 min, and each of the 7th grade math teacher split the class into three groups: A, B, and C.  Each letter group went through three different 12 minute rotations, visiting each math teacher and then all students went back to their own math class for a 20 min fun food filled celebration.  The extra 4 min were for transition time between the classes.  I was the official timekeeper so once students were settled I set my iPhone timer for 12 min.  As soon as it went off I let the other two teachers know it was time to switch.  I think the timer was really important or we would have gotten ourselves off track timewise.  We wanted to have the 20 min at the end so students could eat the treats they brought in.  


Started out by showing a short video clip from Discovery Streaming on finding the circumference of a circle.  

For my Honors math the students worked on this Circular Sudoku puzzle (and I realized after the fact that I spelled Sudoku wrong, OOPS, that's the beauty of google docs, it's already fixed).  This was REALLY challenging for students.  We never do Sudoku in class some students understood the concept and others had never done a puzzle.  No one came close to finishing.  I told the students that anyone who finished over the weekend and showed it to me would get some candy.  No one followed up on that.


For my Math 7 classes I showed the video clip and then had the students work on the  Circle Learning Station in their groups.  With the very short amount of time most groups just found the circumference.  A few groups had the extension of finding the area given the formula.  The formulas were discussed in the video clip and written on my whiteboard.  When we got to Chapter 12 we still did the activity with circles and string to see the relationship between diameter, circumference, and pi.  It was impressive how many students remembered the circumference and area formulas when we got to Chapter 12.

One of the other teachers did a Kahoot that the students loved.  The other one did something with dropping toothpicks (totally don't remember the name of it, some of you probably do).  The students really enjoyed all the treats brought in for the class celebrations.  I took a photo of each class hour's treats and boy were they impressive.  I told students to bring in any "circular" treats.  A couple students in my 6th hour ended up bringing in pies.


This was a completely exhausting day of having three different groups in 12 minute rotations for four different classes.  By the end of the day I did not know if I was coming or going.  The kids loved it and it was nice to something "fun" for a change while still being educational and relating to our 7th grade curriculum.  It was also fun to get to meet students from the other two houses.  Hopefully next year we will find more opportunities to do activities like this where we are able to mix students from all three houses.  I think for our first time things went really well and I'm already thinking about what I can do better for next year.


A funny side story, the other day I finally met my new next door neighbors.  My 9 yo son Cooper actually met them months ago on Pi Day because he was selling coupon cards for LAX.  Well when we were talking the other day, I apologized for being such a lame neighbor and waiting so long to introduce myself.  I was talking about teaching at our middle school and my neighbor told me how when he met my Cooper for the first time, he introduced himself and told him his mom was a math teacher and that it was Pi day and Cooper explained what that was.  The guy was so impressed and thought my son was some sort of prodigy to know that.  LOL those are the kind of things you just know being the son of a math teacher. :)


Tuesday, July 8, 2014

Triangle Inequality Theorem- CCSS 7.G.2

Chapter 10 of Carnegie Learning Course 2 (7th Grade) is Triangles.  The lesson sequence for the chapter is shown below.
  • 10.1 "Triangle Sum, Exterior Angle, and Exterior Angle Inequality Theorem
  • 10.2 "Constructing Triangles"
  • 10.3 "Congruent Figures and Constructing Congruent Triangles"
  • 10.4 "Triangle Inequality Theorem"

I won't even get into it with you that geometry constructions tend to be the bane of my existence and that students are now doing constructions that were previously done in HS geometry.  That post if for another day.

I will tell you that I love this lesson and my students enjoyed it too.  It involves giving every student a piece of pasta and then having them randomly break it into 3 pieces.  The students then measure the three broken pieces (I had them do it in cm).  

They put the three pieces together to see if they are able to form a triangle.  There is a table they fill out and then compare their results with their table group.

We have a triangle

Another triangle

Students diligently working
Busy mathematicians dressed up for a spirit day
I then had students come up to the SMARTBoard to record their data.  I made sure to call on students who had/had not been able to form a triangle.  Students recorded the same data on that was on the SMARTBoard, other than the first data set was from their own findings.

Sharing data with the whole class
This lesson does such a good job of building students conceptual understanding of the triangle inequality theorem.  They also are also able to figure out the triangle inequality theorem by looking at the data in the table.  They realize that the lengths of any two sides of a triangle must be greater than the third side.

The lessons ends with practice problems where students determine whether it's possible to form a triangle with a given set of side lengths and when given two side lengths, what can the conclude about the third length.

Prior to using Carnegie curriculum I used to model the triangle inequality theorem by cutting straws different lengths and then having student determine when they formed a triangle.

Saturday, July 5, 2014

Active Vocabulary Skits

Our Chapter 9 "Using Geometry" has 40 identified key terms of vocabulary.  I think this is the most vocabulary loaded chapter of our text.  One day I decided we needed to spend a little more time making sure students understood some of the key terms (not all 40 mind you).  I think I picked out the 20 most important words I wanted to make sure we focused on.

 I decided I wanted to have them do something more fun and active for getting them to discuss the meanings of the words and so before school that morning I came up with and idea to let them teach the vocabulary term any way they chose.  I need to get my students up and moving around more and these Active Vocabulary Skits are a perfect way for them to do that.  They also get to have fun working in their teams which helps them build relationships.

 I gave my 2nd hour class that option, but found that the students had the most fun and were more engaged when the groups acted out the words in skits.  I ended up having my 5th and 6th hour just do skits for all the words. These were not elaborate skits, many just involved acting the word out.

I wrote the 20 vocabulary terms on index cards.  In my class students were divided into six different table groups of 4 or 5 students working together (except for my Accelerated Math class, which had 34 students so I had an extra group of 4 who sat at the table).  I first had a student randomly choose two different terms and then I modeled for them how to act out the term.  This way I took the pressure off them, by showing them what the expectation was.

I then passed out three index cards to each group. I don't recall how much time I gave them to figure out their skits, probably more than 5, but no more than 10 minute.  I had them act out their terms and then students were able to guess the word. Once the word was guessed correctly, the group was responsible for giving the definition of the term.


Vertical angles

Congruent angles or the start of the song YMCA ;)

Straight angle

I don't remember this term, but I think they did a more elaborate skit with speaking parts

Students had a lot of fun and I have to say they were very on task and engaged in their learning.  I definitely plan on using this strategy again.  Going through these photos makes me miss my wonderful students.  We had lots of fun last year and I miss them!

Tuesday, April 15, 2014

Small Group Google Form Request and Spreadsheet


I'm linking up this post up at Head Over Heels for Teaching and her Spark Student Motivation Saturdays, because I got very positive feedback from my students when I let students request small group intervention via a Google Form


I'm home today with a sick boy and am finally blogging about something I did in my class last week that far exceeded my expectations.  I didn't take any photos while doing this and I'm home today so perhaps I will update this post later with more photos, but everything is at school and I'm home today.  The main focus of this post is the Google Form and Spreadsheet I used.  I had a last minute idea, the stars aligned, and when I called my tech coach he had a few minutes available to help turn my idea become reality.

I spend lots of time pulling small groups for mini-lessons or conferring about formative feedback I get via entrance/exit slips.  Last week we had a MATHia day prior to our Chapter 10 Assessment on Triangles.  Students had the option to work on the computer or request extra practice/small group instruction on various concepts being assessed the next day.

With the assistance of the best teach coach ever @chadkafka I created the google form shown below where students could sign up for some extra practice/discussion any concepts they felt they still hadn't mastered.  I created a google shortcut for students to access the google form.  This form seriously took me about 10 minutes to create. If I can do it anyone can.  Really, the creation is a fairly intuitive process. Interested students completed the form and I had instant data on who I would be working with during math class/ Core Plus that day.


If you click to picture below you can see the results of my form.  It was so easy to see everything in one place in Google Drive.  I hid the student name column so I could post this for you to view.  That would be located directly left of the class hour.  I ended up using the purple shading because I had students in 6th hour that were separated and I was not able to sort them by class hour because the sorting feature was being problematic the day I was using this.

Google Form results allowed me to form small groups.
I do like the idea of shading the box (dark purple) once the student has completed a learning station/small group lesson on a concept so I can keep track of who has completed what. There was a lot of different things going on at once based on student request.  I also keep notes in the last column if students worked on this during Core Plus or Class.  I love having this data to refer back to and also to inform parents if students are taking advantage of these added opportunities or not.

This worked so well for me.  I did a post about the three Learning Stations I created last year.  I had students use these to practice independently after I modeled for them how the station worked.  I wrote the answers on a post-it on the back to the center and gave the student the sheet protector with the card in it.  Students really enjoyed using these to review for the assessment.  They checked in with me after completing the station and most were able to solve for a missing angle x using the concepts of either the triangle sum theorem or exterior angle theorem.  I'm posting the photos below because they are saved on my computer from when I created the stations last year.

Each color is a different station

Direction sheet.

Each station had six cards.  I also attached the answer key on the back of the white sheet. The cards were actually on the other side of the sheet protector when I handed them out. 

I also made worksheet that had two different triangle constructions for students to practice.  The constructions have been really challenging for many of my students.  While many have mastered how to construct a triangle using given sides or angles, many still struggle.  If students just wanted more practice they worked on this independently, but many preferred to have me model the construction for them in a small group.  During mini lesson time in workshop I use the SMARTboard compass to construct triangles.  Some students prefer watching me use a real compass to do the construction step by step while they complete their own construction.

The last three concepts, determining congruence in triangle, determining possible side lengths for the third side of a triangle when two are given, and whether three side lengths would form a triangle, were all done in small groups with me using whiteboard examples and lots of discourse.

What I loved about using the Google Form for students to request small group lessons was the ownership it put on the students.  This gave every student access to work on concepts they still felt they needed more work on.  I pull small groups all the time, but usually I use entrance/exit slip data to determine the groups.  This gave students choice and voice in what they still needed/wanted to practice prior to the assessment.

I will definitely be using Google Forms more frequently to get feedback from students.  I would also like to create some entrance/exit slips on a form.  I will be sure to share on the blog anything else I do.  Let me know if you have any questions and I definitely recommend you try making a Google Form yourself.  It's so easy having the data collected on a Google Spreadsheet could not be easier to view!

Friday, February 14, 2014

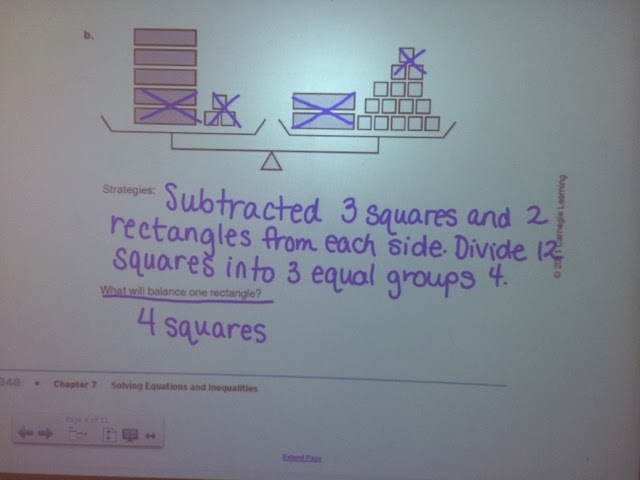
Small Group Lessons on Two-Step Equations

We started our unit on two-step equations and inequalities last week.

Day 1 Lesson was "Picture Algebra"


Day 2 Lesson was "Solving Equations"


On Friday my students had a MATHia Day where they spend the 60 min class working on the computer.  I gave the students this entrance slip as a warm-up.


While they were working on the computer I sat and graded the slips and started forming small groups for lessons on two-step equations.  I also have a class everyday day called Core Plus (different students on A/B days) which I use for intervention when students need it.   Core Plus meets right before lunch so I had my students from afternoon classes complete the slip.  I then started pulling small groups that day.  It's so helpful when I can get a jump on things during Core Plus because then those afternoon students can be more independent during class or MATHia and I can focus my efforts on the students who need help, but are not in my Core Plus.

Monday was another MATHia day and after the warm-up and a 5 minute mini-lesson modeling a MATHia problem I began pulling small groups.  I have a table in the back (or front depending on how you look at it) of the room where I can pull small groups of students. I pulled groups of 2-5 depending on what students needed help with.  I really need one more chair because I only have 5 chairs total and I use one of them.  I do have stool that kids love to sit on so that can be pulled over if a group is bigger than 4.


I started with students who showed the most mastery, but just needed little reminders on properly setting up equations and showing work.

I feel sometimes my time gets monopolized by the same handful of students who need more intervention time and I knew that the mini-lessons for the students who already show more mastery would go quickly so I started with them first.

I loved the conversations I had with the groups that were focusing on the higher level problems of having to first distribute and then solve the equation when there were variables on both sides.  We hadn't really done a problem like that yet and several students figured it out.

I was busy right up until the bell rang in every class.  I loved doing the small group lessons because once again I am getting a very good feel for where each individual student is at with their two-step equation solving.  I made some notes on students' slips when a few times I felt a student still needed more practice to become more fluent in their equation solving.


It was really easy to look at the students' slips and group them into small groups just by visually seeing their mistakes.  I would call the groups to the front table and each student had a dry erase board, marker, and erasing cloth.  Students had the option to work on their entrance slip or the dry erase board and they overwhelmingly chose to work on the dry erase board.

As a group was working each student would hold up their board as they completed a problem.  I could quickly scan the board and point out any errors or let them know it was perfect and they could move on the next problem.  Once a was satisfied (and they agreed) they were understanding the equation solving they went back to and worked on the computer.

Sunday, April 14, 2013

Slicing Three-Dimensional Figures- CC 7.G.3

CCSS 7.G.3 Describe the two-dimensional figures that result from slicing three-dimensional figures, as in plane section of right rectangular prisms and right rectangular pyramids.

I was really pleased with how the Carnegie Curriculum addressed this standard in the collaborative classroom text.  They devoted three lessons  to this standard:  slicing through a cube, slicing through right rectangular prisms, slicing through right rectangular pyramids.  My accelerated students really enjoyed these lessons and did a fabulous job working in their collaborative groups.

The lessons involved students making 3-d figures out of clay (although I used play doh).  Play doh worked very well and was easy to clean up and keep track of (each group got a different color play doh so there was no confusion).  I used the itty bitty containers that people give out for TOT sometimes.  This worked perfectly.  Each group had a container of play doh, a plastic knife, and dental floss.  Most groups preferred to use the plastic knife for slicing, but I did have a couple groups use the dental floss.  Students had to take turns shaping and slicing the figures.

This hand on lesson is something any teacher could easily put together.  I think it is helpful for students to see what those cross-sections look like because it can be difficult for students to sketch them.

My youngest son was not happy to see this play doh heading to school with me

Everything fit in a gallon ziplock
 Day 1 I forgot my camera so I have no photos.  Boo!  But really you can get the idea from the photos I took Days 2 and 3.  The students really enjoyed this hands on lesson and no matter how old they are, they still love play doh!
Slicing Day 2

More slicing Day 2

More slicing Day 2
 I only took one took two photos of them working the third day because I was so busy going around to each group and checking their answers with them.  Nice pyramid don't you think?
Day 3
Each lesson had a graphic organizer at the end where students had to cut out and match up the name of the cross-sectional shape with the appropriate diagram and verbal description of the way the figure was sliced.  I only took a photo of the graphic organizer the last day.  This one was done fairly neatly.  I tell you some of them lose those cutting skills they work so hard to develop in the primary grades by the time they hit 7th grade.  :)
Day 3 Graphic Organizer
I will admit that last year when I saw CCSS 7.G.3 I was kind of dreading it and thought it would be a pain and mess.  I am happy to say that the lessons were well developed and a perfect lead in to the lessons on surface area and volume (CCSS7.G.6)

Wednesday, March 20, 2013

Entrance/Exit Slips

I have been using exit slips in my class more frequently and I am really loving them for a quick and easy formative assessment of students' understanding.  I really should call them "Entrance Slips" because I tend to use them in place of a warm-up the day after teaching a lesson.  We have 60 min classes, but I rarely have time to give an exit slip and prefer instead to let students start their homework assignment with any time left at the end of class.

If I use them as "entrance slips" I have them on student desks prior to class starting or I hand them to students as they enter my room.  The slips are designed to only take 3-5 min to complete.  Students complete the slip while I walk around the room stamping homework.  There is also an answer key projected on the SMARTBoard with assignment answers so students begin correcting the assignment once they have handed in the exit slip.


One of the things I really like about using the exit slips is that I choose the questions to write.  I have found this is a great way to get at students misconceptions, like question 4 above.  Quite a few students forgot that lines are infinite so you can't have one longer than the other despite what the drawing looks like.  My students also liked having the slips as an additional review tool for assessments.


 I have used the exit slips to form small groups for mini lessons.  I've gotten very positive feedback from my students about working in a small group focusing on only what they need.  They really appreciate not having to go through concepts they've already shown they mastered via the exit slip.  The exit slips give me a much better handle what concepts each individual student has mastered and what they need more instruction on.


I find I am able to check the exit slips very quickly so I can do same day feedback if I have time.  In the picture above, I created a checklist of the skills the students did not get correct on the exit slip.  The squiggly lines mean that student mastered everything on the slip.  I am able to see trends in students and even classes.  This allows me to customize my instruction and small groups to meet the needs of each individual learner.

Entrance/Exit slips are a very powerful formative assessment tool that you can use as a teacher to get lots of information very quickly.  My ultimate goal is to create learning stations for the concepts I am assessing and then if students need more practice they can either get a mini lesson from me on it or they can work individually, in partners, or small groups to work through the learning station.

Do you use exit slips in your classroom?  If so, how do you use the data you collect to drive instruction?  If not, I highly recommend you start using them.  It will take some work up front to create the exit slips, but I promise they are well worth your time and effort.


Saturday, April 7, 2012

Learning Stations-Circles. Tangrams, and Pentominoes

A few days ago we did some learning station work in my regular math classes.  We made three different learning stations and rotated them between the six table groups in my class.  It certainly was much easier to do these learning stations this quarter because I have a student teacher.  Two teachers are definitely better than one!  My fifth hour class is my inclusion hour and there were three of us.  The stations were pretty loud and sometimes chaotic with more than one group finishing different centers simultaneously, but the students were really engaged in their problem solving and most groups collaborated really well.

Two of the learning stations were activities I found in the binder Tangrams and Pentominoes purchased many years ago from Nasco.


I was shocked how many of my students had never used tangrams or pentominoes.  In past years they were really familiar with tangrams and this year some students said, they had used them in previous years.  No one knew what a pentomino was.

The tangrams with the introductory tangram packet.

Students working.

This girl really wanted her hand in the photo!  :)
The pentomino station seemed to be a student favorite.  They really enjoyed solving the pentomino puzzles.  Several students asked to do the next pentomino packet after they finished the three learning stations.
Pentominoes with the intro packet.

Students really worked together on this and had fun.

Many wanted to keep doing pentominoes.

The final station was measuring the radius or diameter of cut out circles in either centimeters or inches.  Then students needed to calculate the area and circumference of the circle.  Our text teaches circumference and then area of circles separately and we definitely felt that this center really helped students to be able to keep the formulas for area and circumference straight.  The special ed teacher who teaches with me cut out all these circles, bless her heart!  I had the idea for the center, but no time to cut circles and she volunteered to do it.  I was thrilled with how the station turned out.

This is a complete station (we stored it in a large ziploc bag.  They needed a full sized ruler for the large blue circle.

Working on the station.

Measuring and calculating.

I made a chart on the SMARTBoard where we kept track of each group's progress on the stations.  While a group was working we put a check mark under that station and after they checked their work with one of the teachers we changed the check mark to an X.  It was important for us to have a visual record of where everyone was to minimize the chaos.  These activities were perfect to keep students focused for the last two days before Spring break.  Can we say it was a bit crazy?!  I was really proud of how well the majority of the students worked together.

I would love to hear about any learning stations you have been using in your math class.  For more learning station ideas shared by other teachers check out this post on Corkboard Connections.